
Disclaimer: Sony does not condone the use of modification chips, and installing them voids your warranty. Do this at your own risk. You are responsible for all damage. You assume all risks, and liabilities related to the modification, possession, use, non use, misuse, and transfer and/or sale of either the chip or modified playstation. You also indemnify the seller of any and all such liablitities
You will need a couple of things besides a psx and a mod chip.
1. A medium sized phillips screwdriver. (#2 I think)
2. A soldering iron with a fine tip. (
unless you want to short your board)
3. A few inches of solder.(Something you can hold on to without burning
your fingers would be nice ;-)
By the way, do yourself a favor and try reading all of the instructions before you try to do an install for the first time. I know how tempting it is to just jump in and do it, but just read first.
 The first thing you
have to do is heat up your soldering iron. I hope it has a pretty fine
tip, because you are about to solder some small stuff.
The first thing you
have to do is heat up your soldering iron. I hope it has a pretty fine
tip, because you are about to solder some small stuff.
Then, next thing to do is turn over your psx and take out the six screws that are holding the casing together. These are the six screws being pointed to in figure 1. If you can't tell the difference between the colors of the screws or you just might forget which ones these are, go ahead and label a piece of paper with something like "outside" so you can tell which these are. There are only 2 types of screws that we'll be dealing with today, so relax.
Now, go ahead and turn your psx back to the upright position and remove
the top cover.
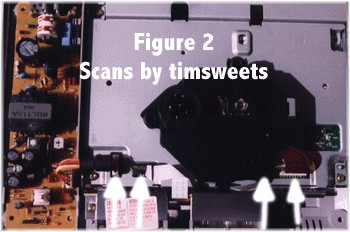
Remove the connectors as shown in figure 2. There are four of them and
each require a little tug.
Hint: to remove the copper colored connector from YOU MUST pull firmly
while holding the WHITE PAPER AREA.
After the connectors have been unfastened, remove the laser housing
unit.
Step 3: Taking off the metal bracket
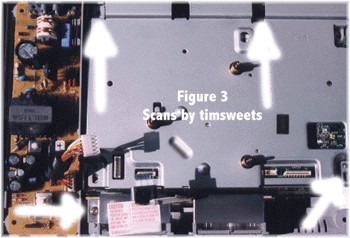
Remove the four screws from the metal bracket in figure 3 and put them somewhere (remembering that these are different from the outside screws)
Now remove the metal bracket put it into a safe but close place. This
will expose the entire circuit board. Were getting closer.
If you have a 750x, then here's where you break
from the general install instructions.
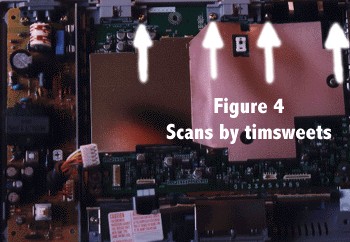
If you have a model 700x, you don't have to remove the board at all, but you do have to move the sheilding out of the way. I usually just take it to the left and tuck it under the wall. It sounds wierd, I know, but you'll understand when you get to it. Remove the four screws illustrated in figure 4 (these are the same size and color as the ones in step 3) and put them somewhere safe.
Now it's about time to get to the real stuff. Go ahead and remove the circuit board unless you have 700x or 750x.
I can't believe it....it's finally time to install the mod chip!!
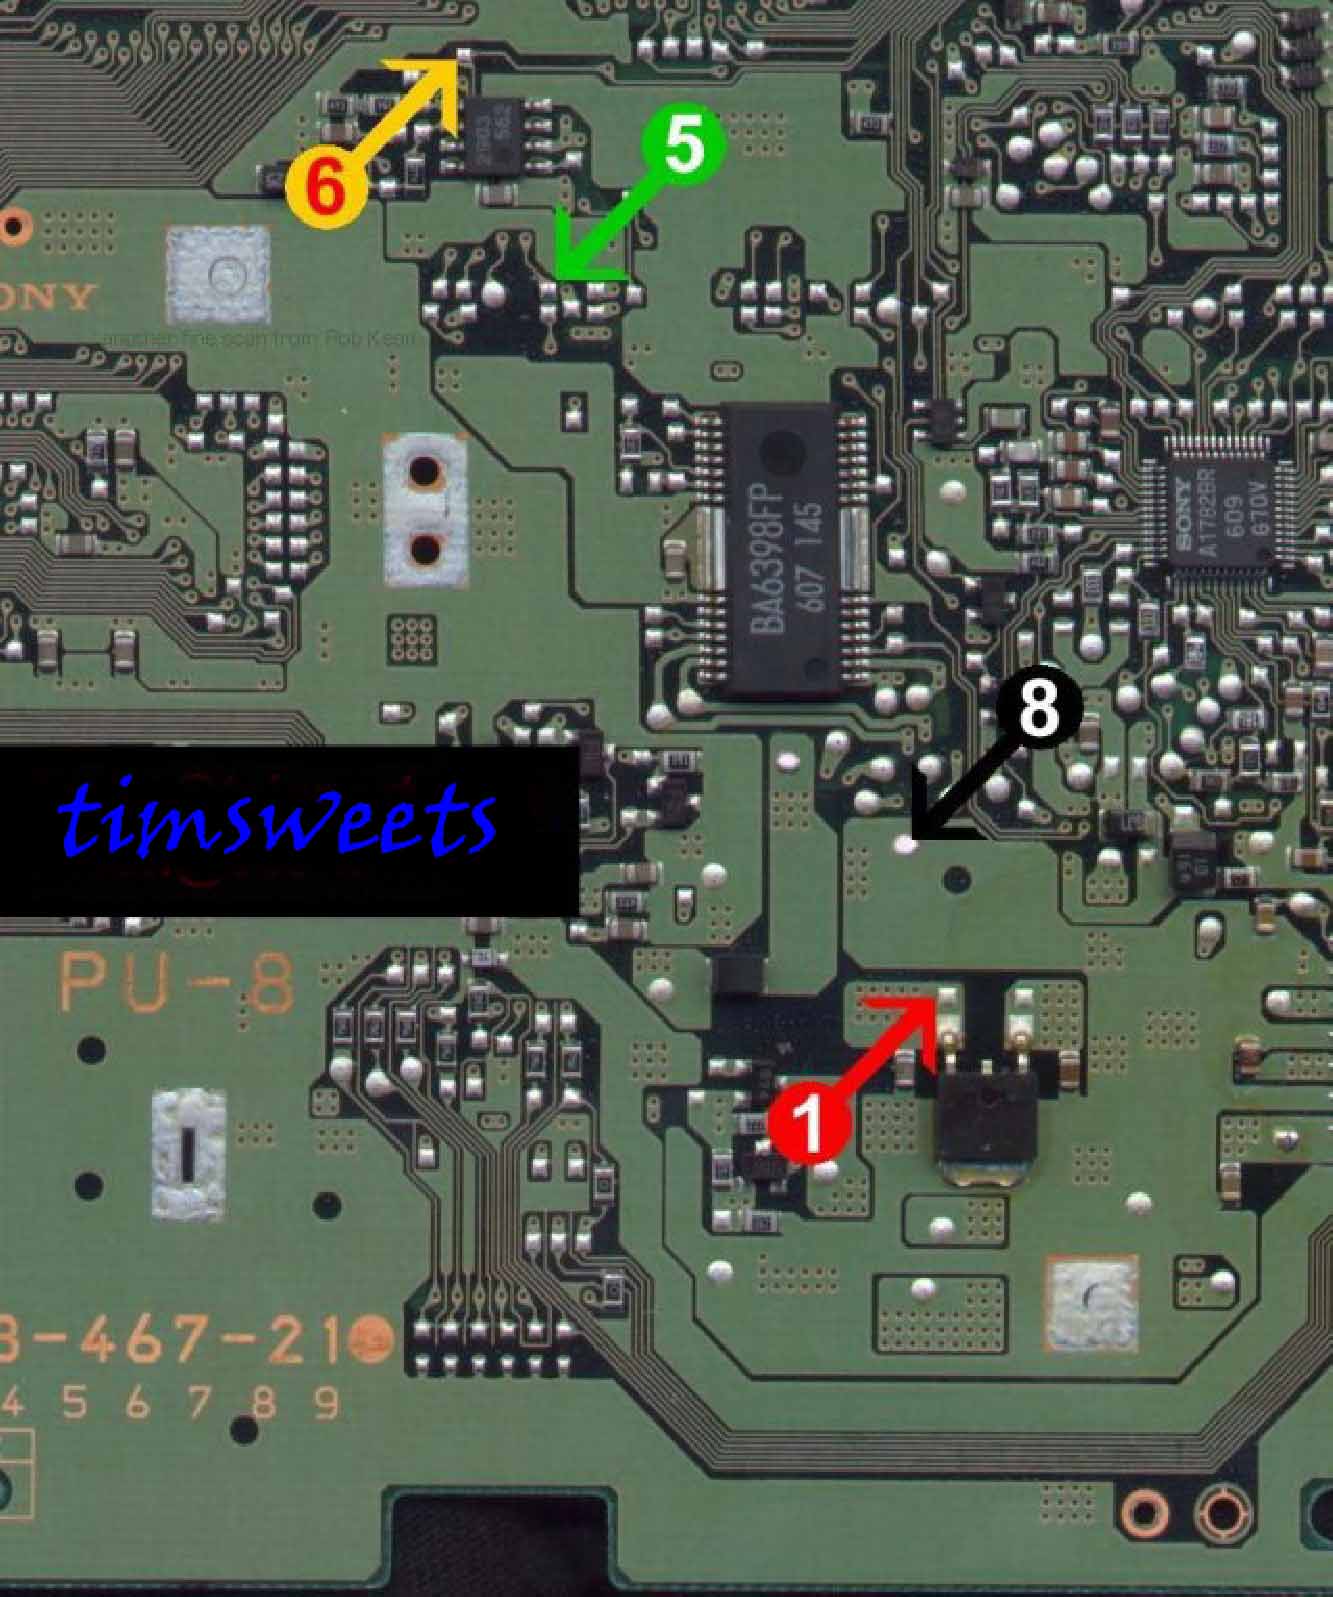
Now flip your circuit board over if you have either the 100x or 550x boards.. That means turn it upside down. The 700x boards don't have anything on the bottom and neither do the 750x boards, so you don't have to flip them over.
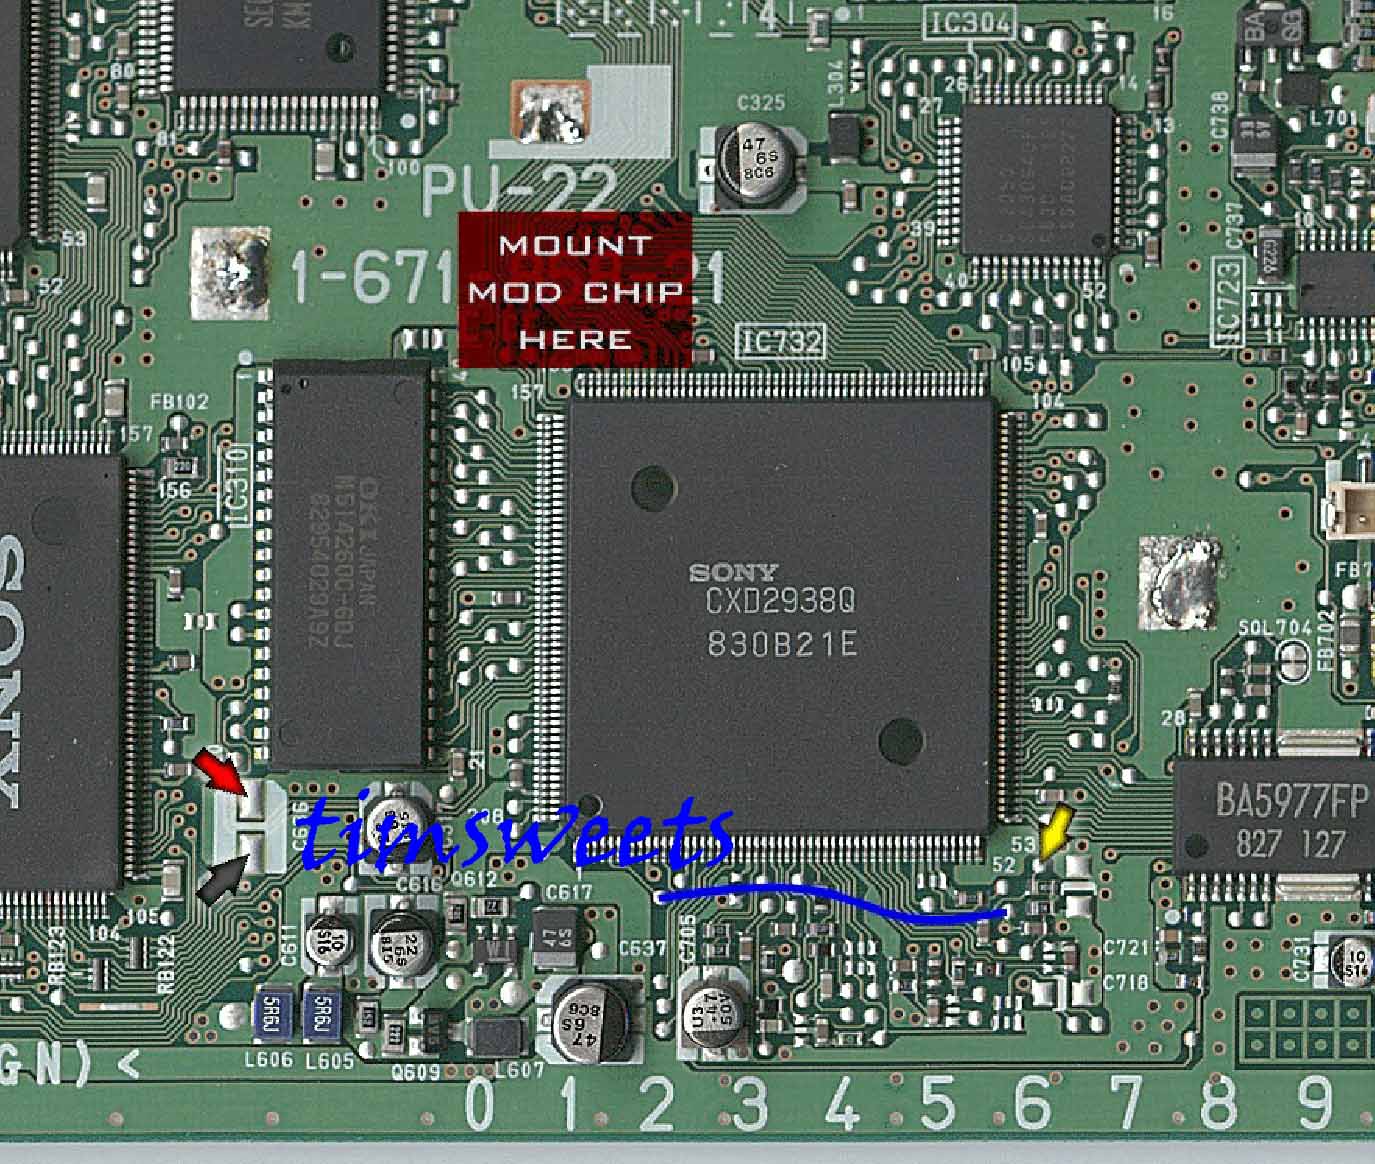
Remove the wax paper of the double sided stick tape and stick the mod chip to the circuit board, but make sure that it can reach all four solder points on the board.
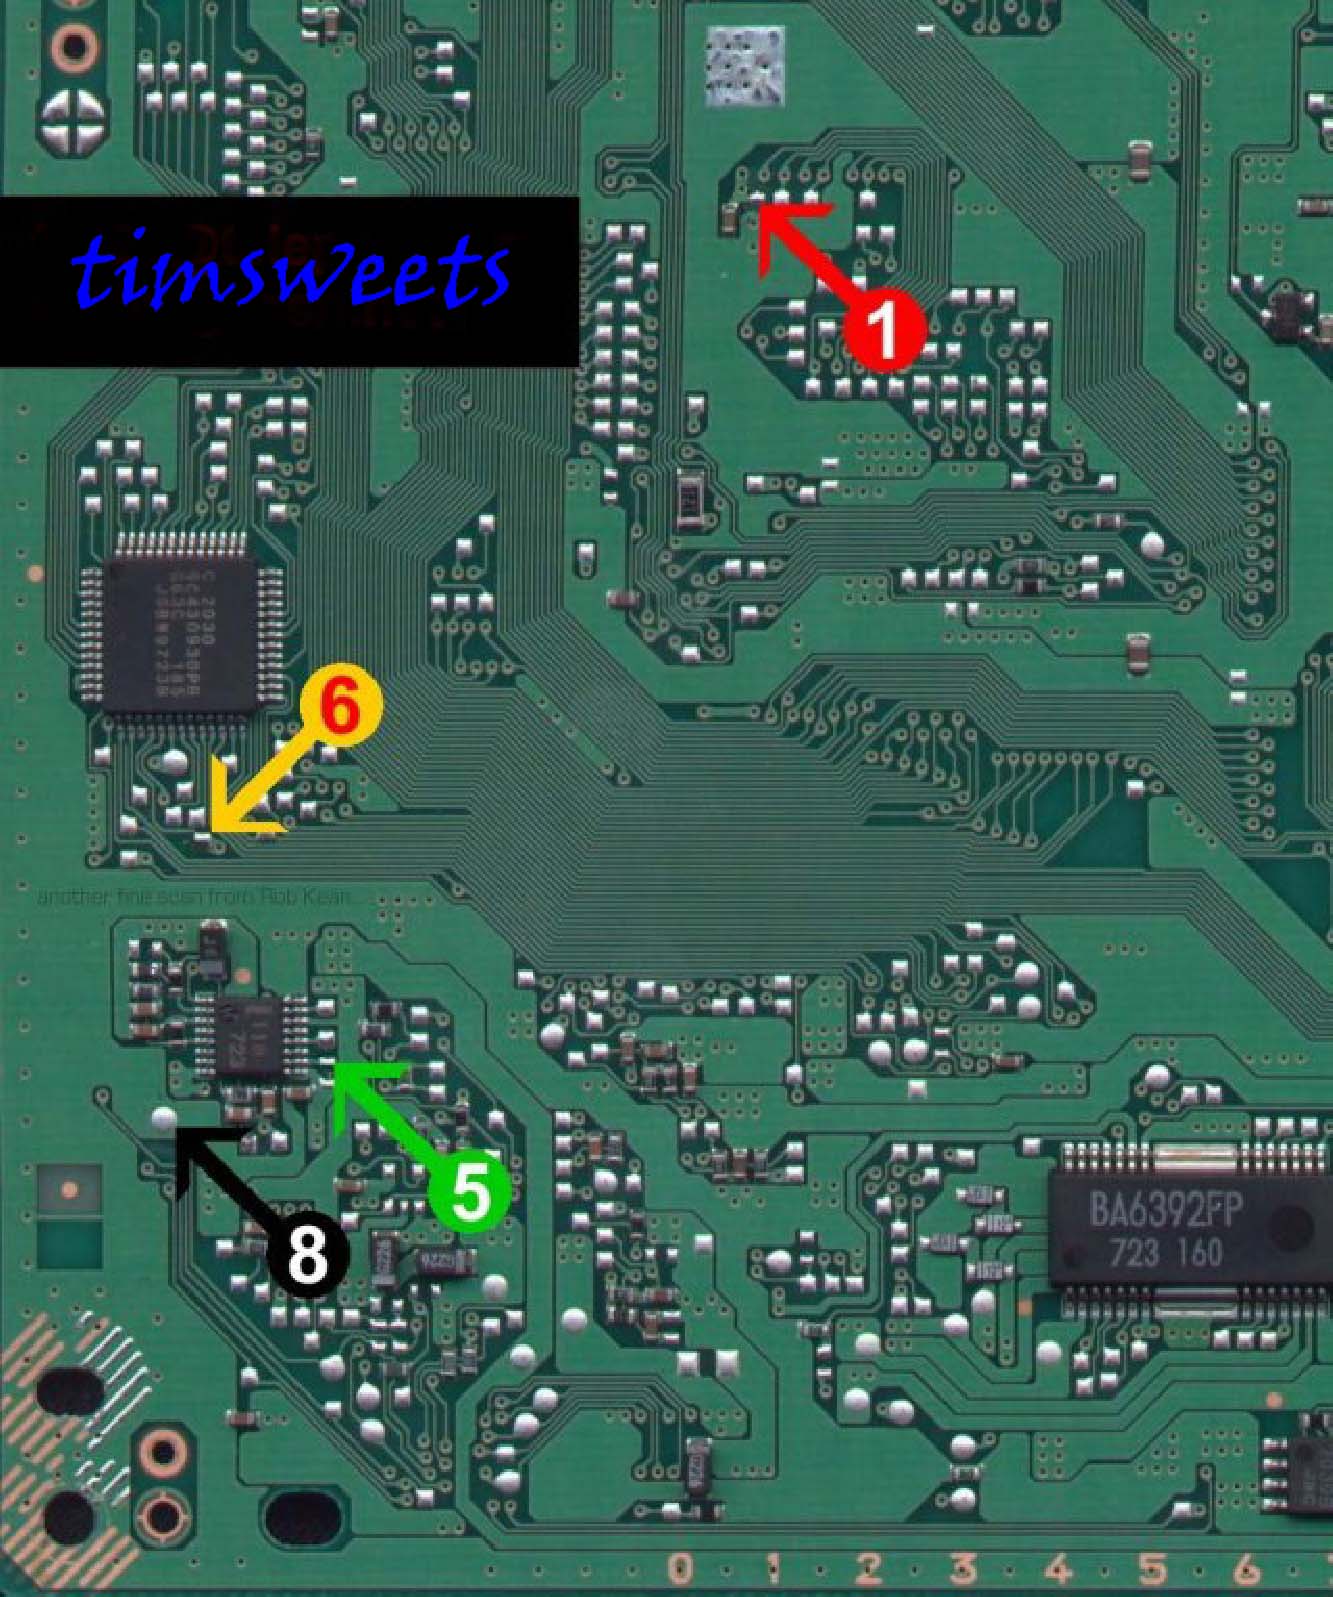
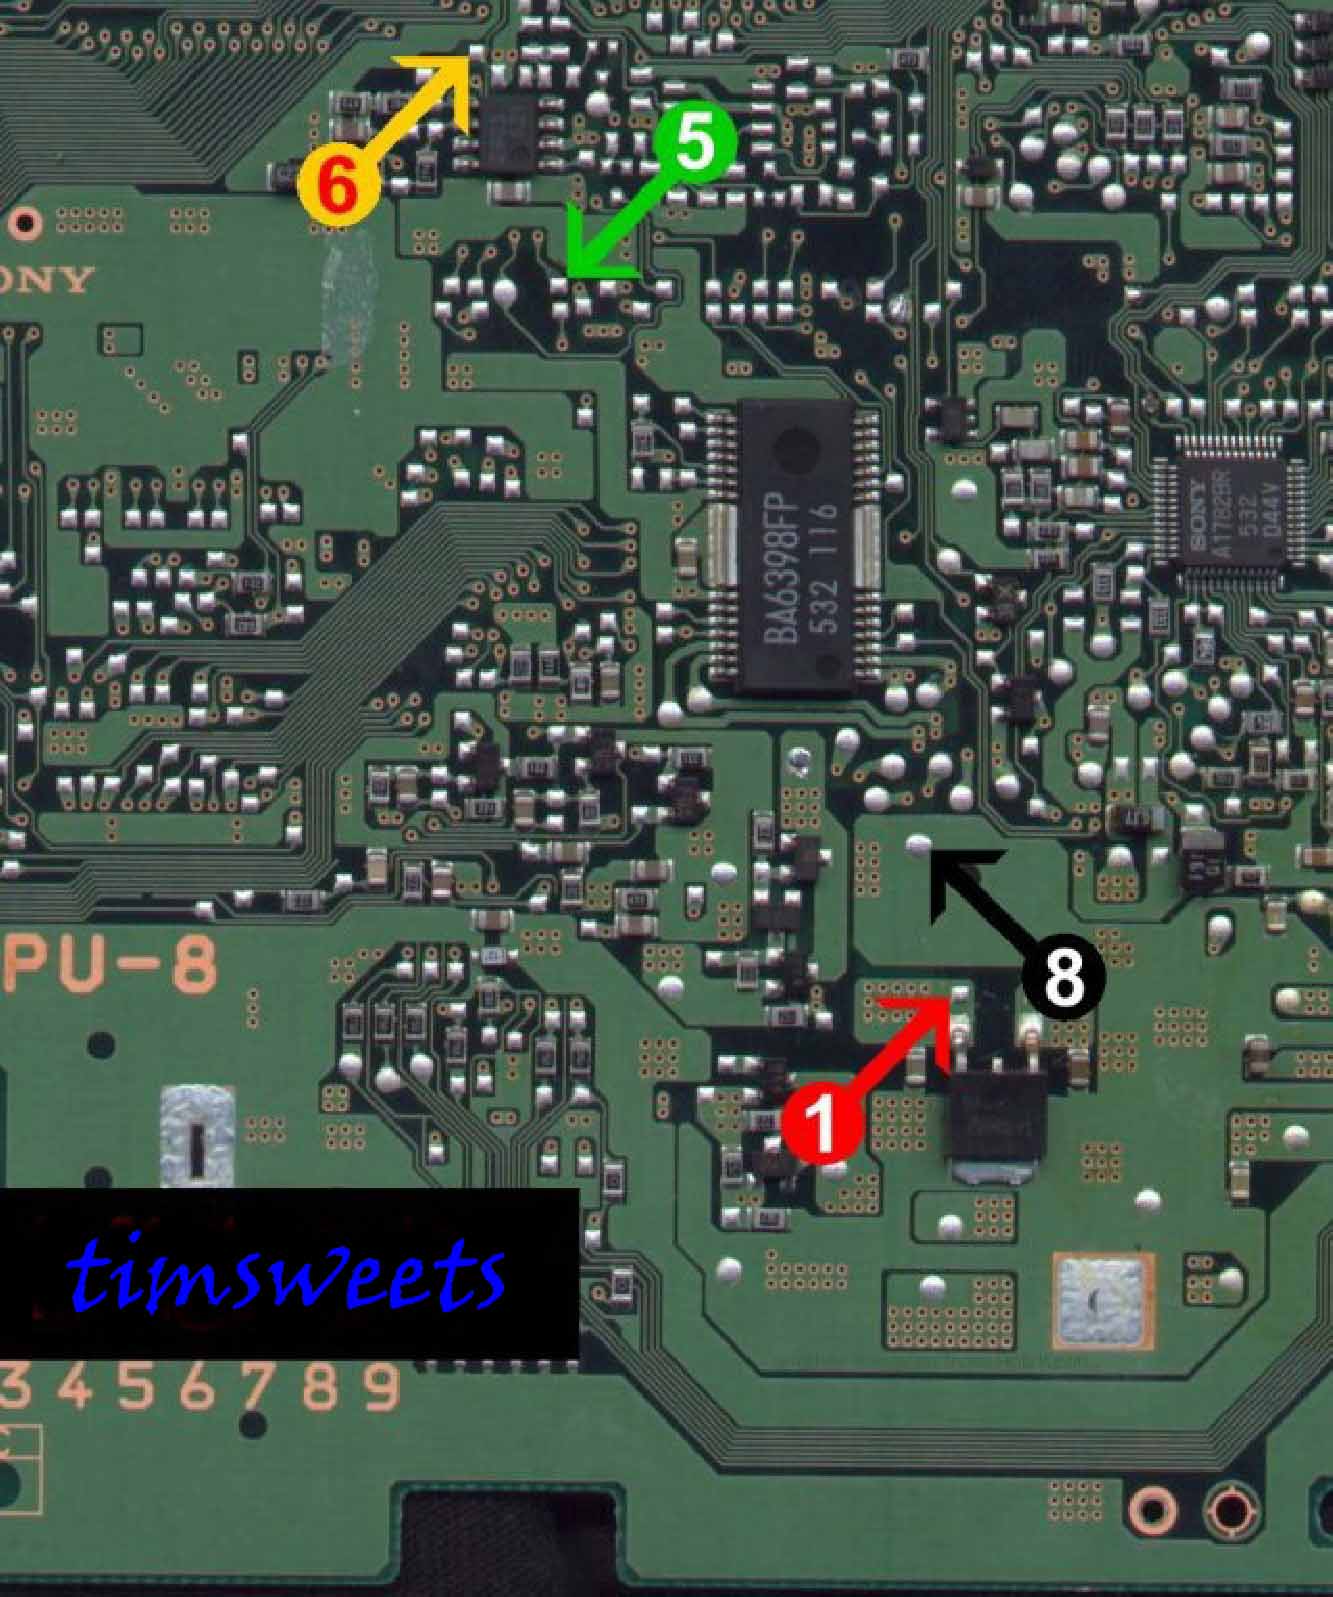
 Select your playstation
model number from the list below. These pictures show where to solder each
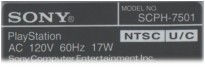
wire for your particular model. On the back of your psx there should be
a sticker that will tell you the model number. (I.E. MODEL NO SCPH-5501)
kind of like in the picture.
Select your playstation
model number from the list below. These pictures show where to solder each
wire for your particular model. On the back of your psx there should be
a sticker that will tell you the model number. (I.E. MODEL NO SCPH-5501)
kind of like in the picture.
Extra installation instructions for the 750x
Just the pics of the boards below
750x (newest dual shock board: PU-22
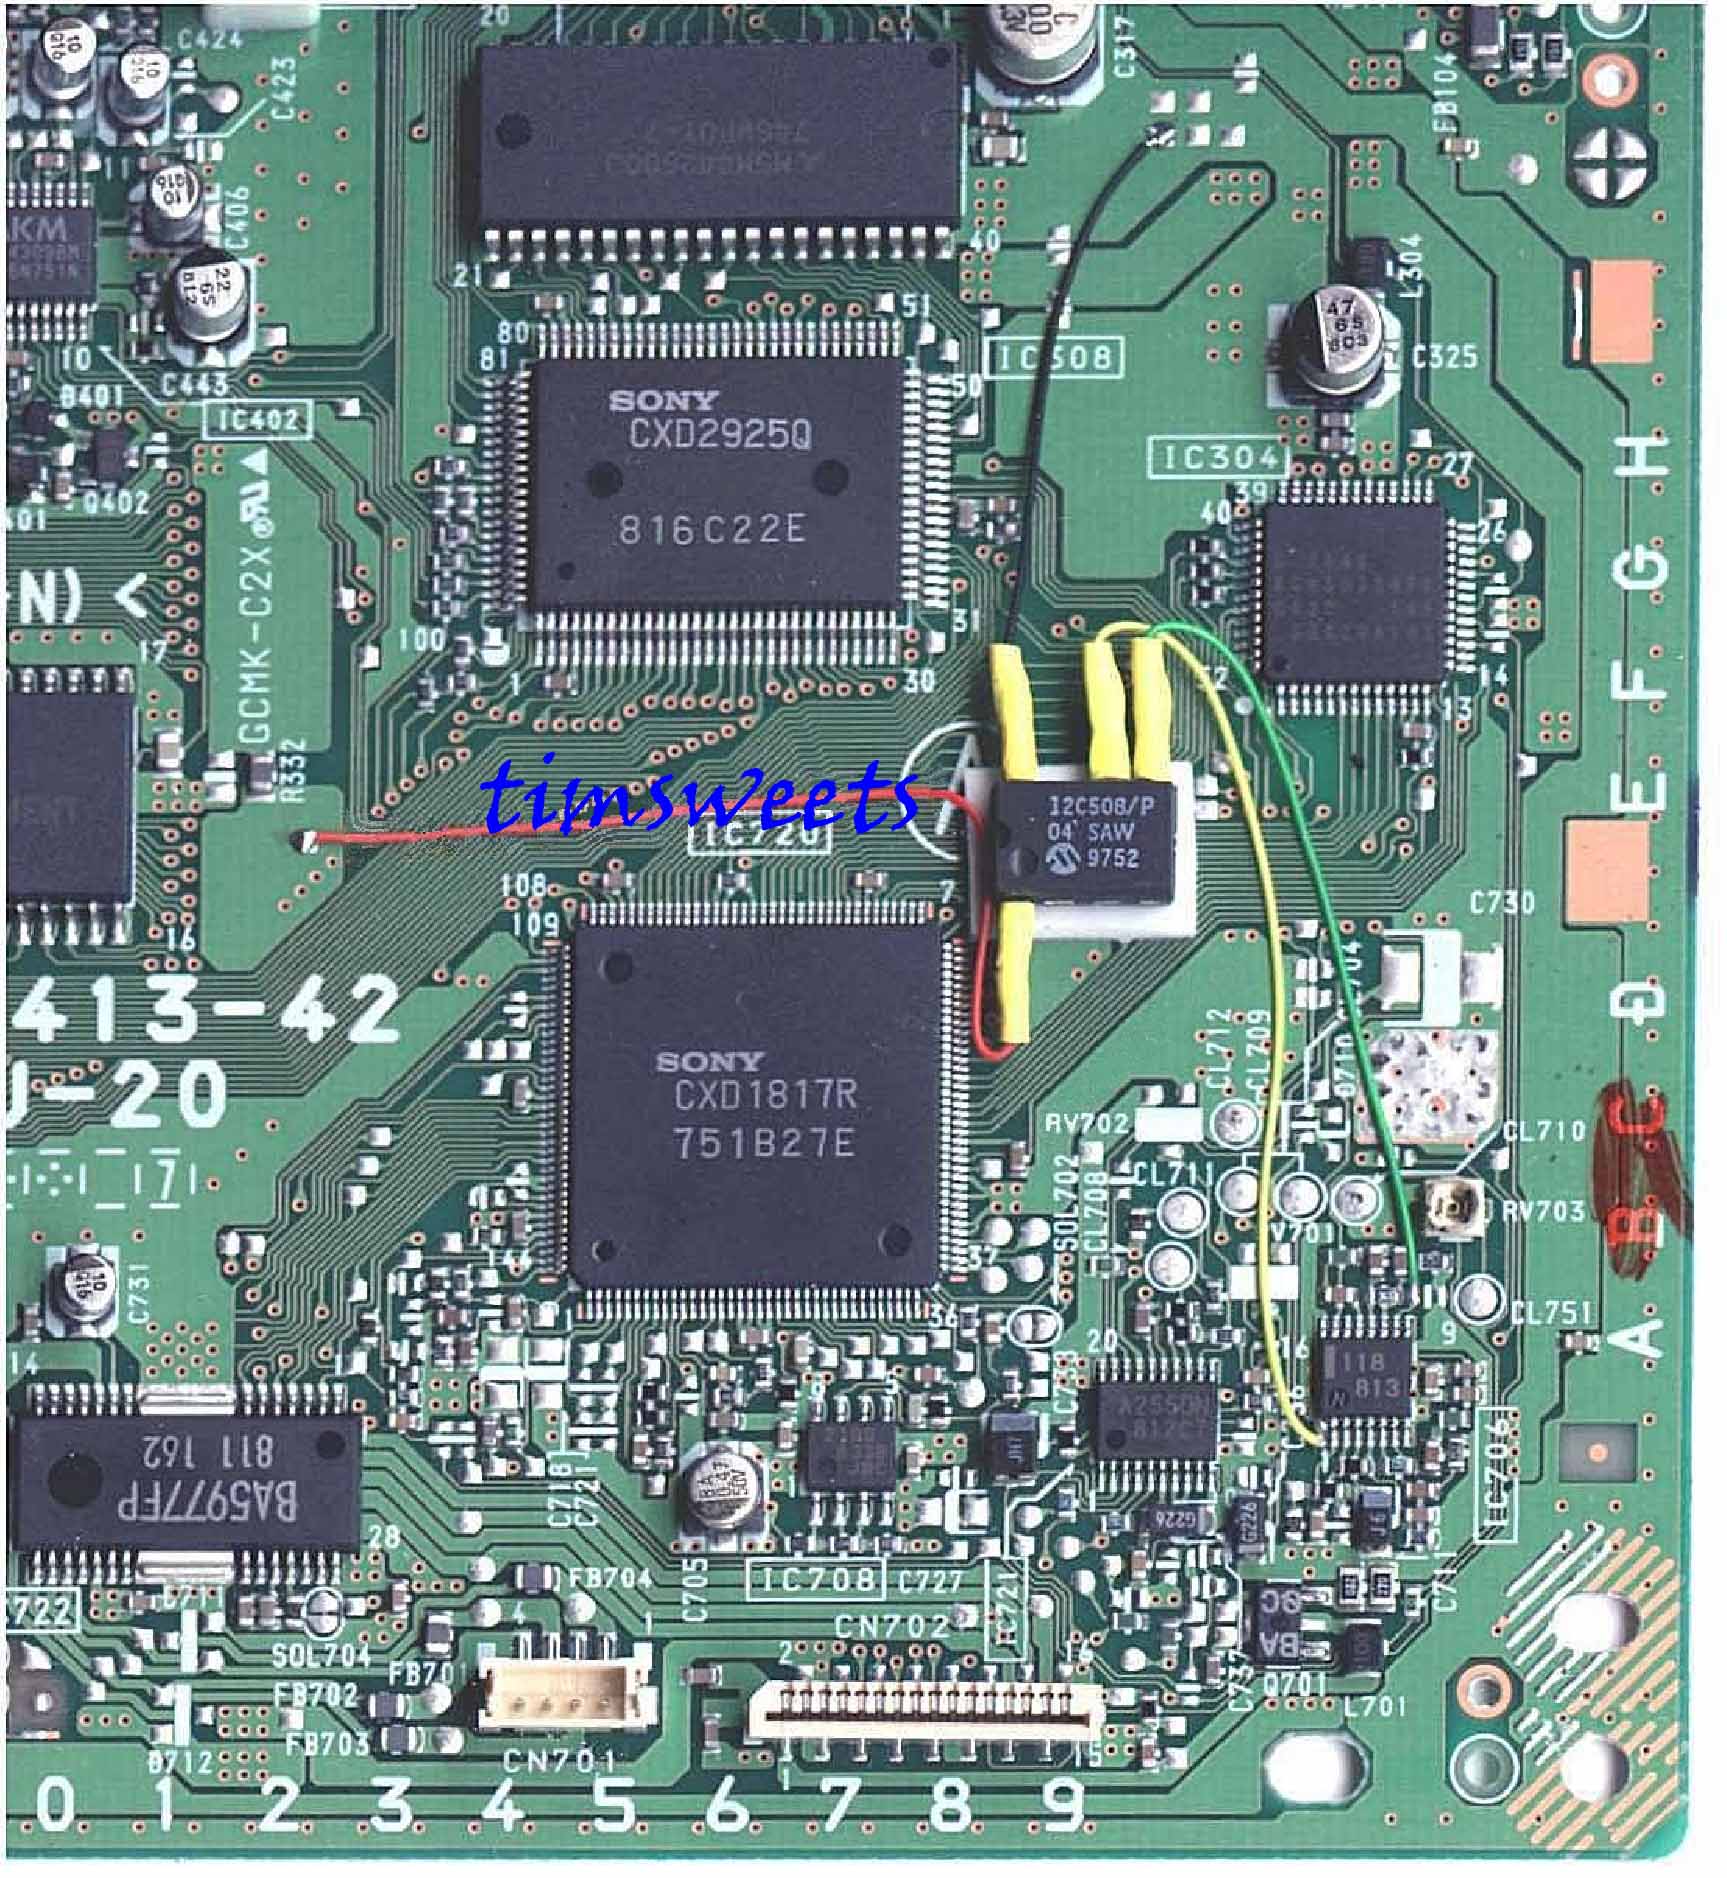
700x (first dual shock)board: PU-20
550X (5501) board: PU-18
100x old board: PU-8
100x new board: PU-8
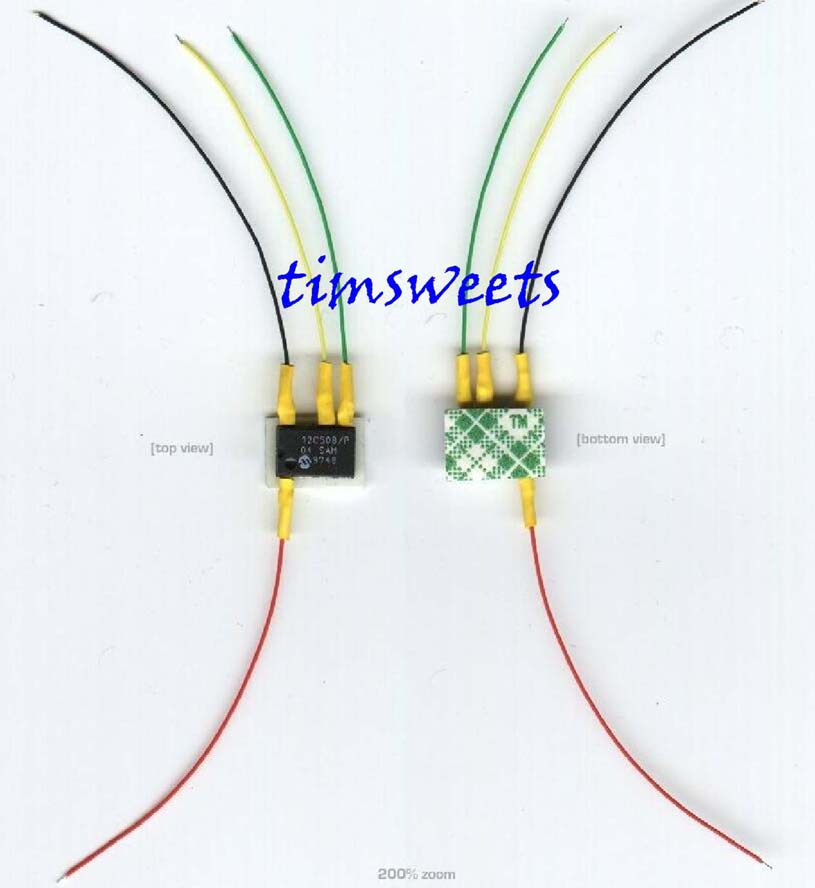
If you want to see a prewired mod chip, click on the link.
Now that you're done soldering the mod chip into place, it's time to put your psx back together. In order to do that, just follow the steps in reverse order omitting the soldering stage.
© 1998 JTNW Design
![]()